Follow these steps in Outlook 2013 or 2016:
- Via the navigation bar at the top left you go to “File”> “Add account”.
- At the bottom choose the option “Manual setting or additional server types” and continue.
- Choose “POP or IMAP” and continue.
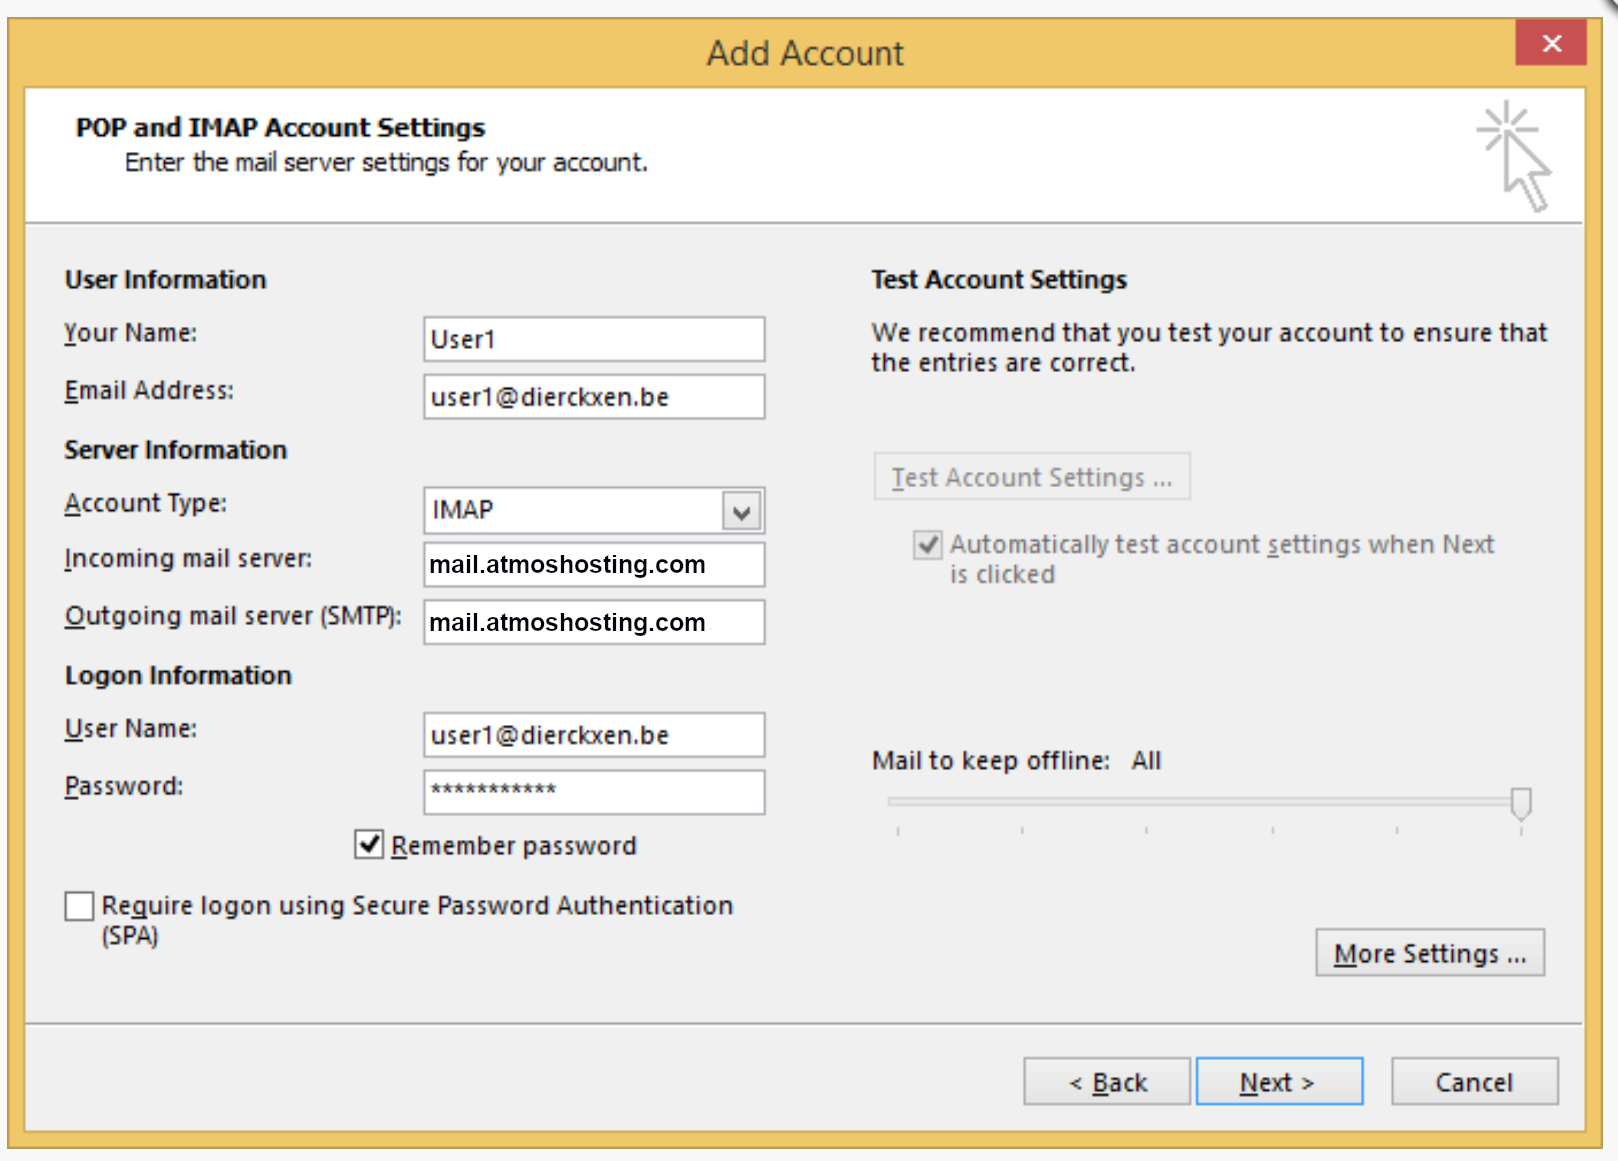
- Choose IMAP in the drop-down menu and enter the missing information (see image).
Name: Enter your name (appears with your e-mails)
E-mail address: Enter your e-mail address
Incoming e-mail server:
For IMAP (recommended): mail.atmoshosting.com
Outgoing e-mail server:
mail.atmoshosting.com
Username: Enter your email address
Password: Enter your password
- Before you click on “next”, click on “More settings” at the bottom right.
- Go to the “Outgoing server” tab and check the option “My outgoing e-mail server (SMTP) requires verification”. Select the option: “Use the same settings as for my incoming e-mail” and click “OK”.

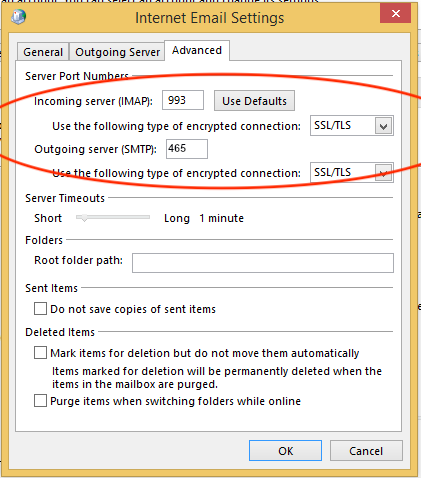
- Go to the “advanced” tab (see image) and make sure the ports match this data:
- For incoming servers this is 993 (imap)
- For the outgoing server 465
- Click on “Next” and Outlook will check your settings and send a test message. As soon as that check is over, your mailbox is active and you can close the configuration.
