Sometimes the mail client will accept your settings and declare the setup done, even though there is something missing. Then you will experience a strange behavior of your mailbox – it will receive but not send messages or vice versa.
To set up your email account on your iPhone / iPad, please follow the steps below:
- On your phone:
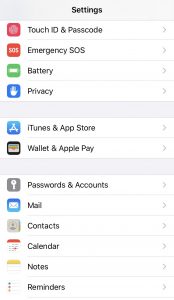
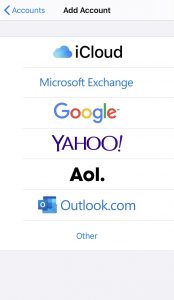
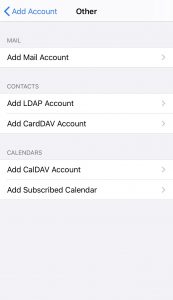
- Unlock your iPhone / iPad and follow “Settings” > “Passwords & Accounts” > “Add Account” > “Other” > “Add Mail Account”.

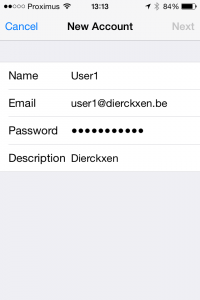
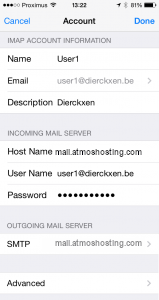
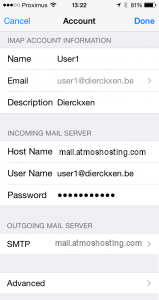
- Enter your names, full email address that you want to setup (ex. [email protected]), the password of that account and a description that speaks to you (ex. Work Email or Personal 2, etc.) and click on “Next”.
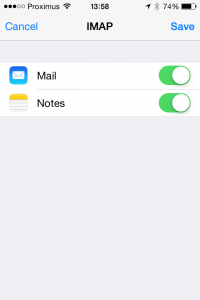
- Choose between “IMAP” and “POP3”.
- For Host Name use your IMAP / POP3 server.
- IMAP:mail.atmoshosting.com (SSL port: 993)
- For User Name use your whole email address (ex. [email protected]).
- For Outgoing mail server, use your SMTP server.
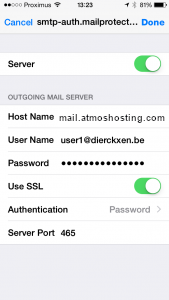
- SMTP:mail.atmoshosting.com (SSL port: 465)
- Enter your email and password once again.
- Click on “Next”.

- Click on “Save”.
- For Host Name use your IMAP / POP3 server.
- Now it is time to tinker the default settings.
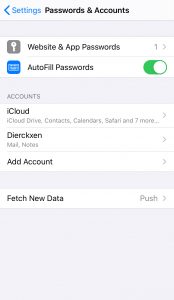
- On your iPhone / iPad follow “Settings” > “Passwords & Accounts”.
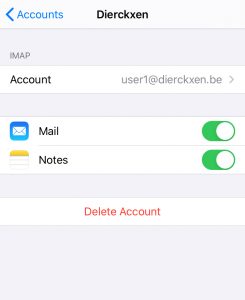
- Click on the account you just setup.
- Click on the email address.
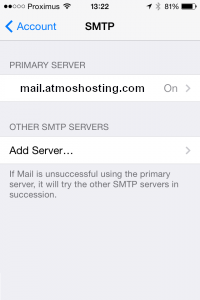
- Scroll down and click on “SMTP”.
- Click on the primary server.
- Change your port to 465 and click “Done”.
- Go back to “< Account”.
- Go back and click on “Done” at the top.
- On your iPhone / iPad follow “Settings” > “Passwords & Accounts”.
- Unlock your iPhone / iPad and follow “Settings” > “Passwords & Accounts” > “Add Account” > “Other” > “Add Mail Account”.
